If
java disabled or no main menu showing above - use links
below.
|
|
Graphics
Image Work -
This is an aspect of the images
subject, where I am looking at the generation of some
sort of graphic design, to be finally saved in one of
our two main image formats - in this case we will save
all files as .JPG.
My own software, is a budget
package from Serif called "Draw Plus6®"
- there are many available these days and the main requirement
is that they are "vector" packages (perhaps
another well known one may be that obtainable from "Corel"
as "Corel Draw®" - say v8 or better, then
there is also Adobe "Illustrator®")
This means that whatever size you draw and design your
graphics, they may be easily and cleanly re-sized to
suit your requirements. Even text may be readily manipulated.
Save as a file type and size to suit your needs.
For this excercise, credit to Serif
for a sample file to demonstrate the process - we will
draw and "construct" an apple, the stages
being well simplified and truncated. |
The
apple shape is perhaps the first thing to be drawn -
a process involving whatever tools you need and have
available in your draw package.
Sometimes you can take generic shapes and combine them
additively and subtractively, or perhaps you may choose
to draw your shape with freehand lines and then use
Bezier curve node adjustments to fine tune the curves.
This first yellow shape is as good a starting point
as any. |
|
|
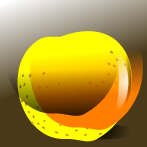
Having
generated a suitable "apple" shape, we copy
that shape to get a further total of three profiles
and layers - shown here out of register so they may
be better seen as separate entities.
These we color with red and greys such that, by adjusting
transparency values and layers, we can overlay them
and start to get some form. We will treat this as stage
1 for convenience. |
By
putting the elements from the previous image into
register with each other, we can begin to see the
formation of our piece of fruit - this completes main
stage 1 of construction proper.
It is as yet incomplete and requires the addition
of other colors - but we will make use of the same
shape by making copies and pasting these so that different
fill colors and qualities may be employed on them. |
|
|
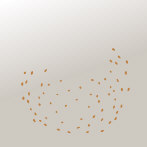
So
- using the common shape and further copies, and incorporating
the first yellow form, we now produce another five
layers, which are stage 2.
We show the full yellow part, orange with transparency
and brown with transparency. A white highlight is
also produced to give the effect of light reflection
- and finally we have the basic shape which is transparent
except for a pattern of spots added - this is produced
specially, see next picture. |
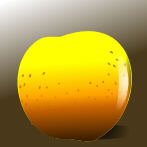
This
image is shown solely to demonstrate the spots on
their own.
They have to be drawn on the basic profile, so that
only the spots themselves show. Thus, the profile
is itself made transparent and finally the spots grouped
with the profile to make a complete object and entity
layer. |
|
|
Put
the stage 2 layers into register so that they are
all in the same plane - and we have main stage 2 of
the construction.
Now we see a more three dimensional look again and
the "spots" give an extra sense of realism.
To take this a step further, to produce stage 3, we
now have to overlay stages 1 and 2, in the correct
layer order, so as to get closer to the final effect
we want. |
Stage
3 now is achieved by combining the main stage 1
and main stage 2 elements, overlaying them in register
and with layers in the right order.
This is now getting very close to the required final
result. To make it complete, we will need something
to portray a stalk on the top, which requires another
set of drawings and layers.. |
|

|
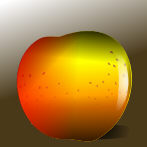
The
stalk and a leaf, comprise several discrete drawn
elements - and I show these in a sort of "exploded"
view, to let you see the various components separately.
With all combined, we get the composite effect of
a stalk and leaf - shown in the lower right of this
picture - call this stage 4. All that is required
then is to group these into one object and locate
onto the main apple shape achieved after stage 3,
to progress to the final stage 5. |
And
so - we arrive at the final stage 5 - we have put
all elements together, including the stalk and leaf
- and finish up with a presentable representation
of a shiny, attractive, and almost tasty looking
eating apple, of 3 dimensional form - if perhaps
stylized.
As mentioned, the original is courtesy of MicroGrafx®,
but the "dismantling" and separation I
have done, has permitted a dissection that shows
how the whole may be constructed and built up. |
|
|
I hope
this example will show you how useful a graphics package
can be - so you can make your own images and so be
both creative and also produce an image which perhaps
you could not obtain by other means. Hardly very relevant
to taking and posting firearms images but - hopefully
still informative. It could though for example, be
a suitable approach for producing certain diagrams.
|
|
Back to Top
|